
Home decor AI product photography is the creation of product images with generative tools to help shoppers picture an item in their space. This guide explains how to plan room scenes, check materials and scale, and choose a workflow without letting an attractive image misrepresent what you sell.
- AI product photography for home decor brands works best when room styling changes but product details stay accurate.
- Shopify sellers should separate factual product views from illustrative room scenes.
- Compare a combined photo-and-video suite with separate tools using the same product brief.
- Reject images that alter dimensions, materials, construction, or included accessories.
Why AI product photography matters for home decor brands
Home decor images have two jobs: show the object accurately and explain how it fits into a room. A plain product view answers questions about shape and finish. A styled room view adds context, but it also introduces opportunities to misrepresent size, texture, and construction.
Use generated scenes to explain placement, not to invent product features. A convincing room does not make an inaccurate lamp, rug, or cabinet acceptable. For your 2026 content plan, separate factual product evidence from creative styling before choosing a tool.
If you sell through Shopify, the AI product photography tools for Shopify stores guide provides another buying-decision reference. Keep your own evaluation specific to home decor: a convincing background is not enough when the product itself has changed.
Your production constraint is not simply making more images. It is approving images that remain useful across product pages, social posts, and ads. Decide which details cannot change, who checks them, and where each approved asset belongs.
Build a home decor photography workflow
1. Define the buying question before the scene
Start with a short document and your existing product information. Write the question each image must answer before describing the room. A decorative bowl needs a clear view of its opening and finish; a wall mirror needs an accurate frame and useful placement context.
Give each image one primary purpose. Otherwise, a brief can become a list of unrelated styling requests with no clear approval standard. Your 2026 brief should distinguish product-page evidence from advertising concepts so reviewers judge each image against the right job.
An illustrative starter brief could request 6 images: 2 factual product views, 2 placement scenes, and 2 detail views. These are planning quantities, not a required output package. Remove any image that answers no new question.
- Name the product and the exact variant being pictured.
- State the shopper question the image must answer.
- Identify the intended placement: product page, social post, or ad.
- List visible details that must not change.
- Assign an approval owner before production starts.
2. Gather references that establish product truth
Use existing accurate photographs first. Collect views that show the front, side, back, and important details where relevant. Include verified dimensions and material descriptions in the brief rather than expecting a generated scene to establish them.
Choose references for clarity, not atmosphere. If the edge of a glass vase disappears into the background, that photograph is a weak reference for checking its silhouette. If a fabric photograph hides the weave, it cannot settle a later disagreement about texture.
Keep different variants separate. A reference folder containing several wood finishes gives reviewers an avoidable matching problem. Name the intended variant explicitly, and retain an untouched reference beside the working files so everyone evaluates the same object.
- Select clear photographs of the exact product variant.
- Record dimensions from your verified product information.
- Include close-ups of edges, joins, textures, and patterns.
- Separate reference files from generated outputs.
- Mark obscured details that require another reference photograph.
3. Choose between one suite and separate tools
You can begin without a new subscription: organize references, write the brief, and review existing assets manually. Then choose software based on the deliverables you actually need. A still-image requirement is different from a campaign requiring both photos and video.
Icarus generates product photos, social and ad content, and videos in one place. Icarus is best for e-commerce teams that want product photos and videos in one suite. That is the confirmed workflow distinction, not a claim of better image quality.
Separate photo and video tools let you evaluate each task independently. The limitation is that your team must manage the transfer of briefs, references, and approved assets between them. For a 2026 buying decision, compare completed, approved deliverables rather than a feature list alone.
- List the still images and videos your campaign requires.
- Compare Icarus AI product photography with a separate-tool workflow.
- Give each workflow the same references and approval criteria.
- Check current terms, usage rights, and export requirements directly.
- Reject a tool if it cannot meet your product-accuracy requirements.
4. Write a scene brief that keeps styling separate
Write the scene manually before entering a prompt. Split the brief into fixed product facts and changeable surroundings. This makes it easier to identify whether a revision concerns the merchandise or only the presentation.
For example, an illustrative brief for a ceramic vase might specify its verified silhouette, surface finish, and opening as fixed. The surroundings could describe a plain console, a neutral wall, and soft side lighting. Do not turn unverified characteristics into instructions about the product.
Ask for one clear composition first. A request combining several room styles, lighting treatments, and camera positions gives you too many variables to judge. When a scene fails, revise the disputed element rather than rewriting every instruction and losing the basis for comparison.
- Keep product facts in a separate brief section.
- Specify the surface, surrounding room, and light direction.
- Describe the camera position and required visible details.
- Identify props that are not included with the product.
- Change one scene variable when evaluating revisions.
5. Check shape, material, and scale before styling
Review the generated image beside the source photographs and verified specifications. Start with the object, not the room. A pleasant composition should not distract you from a changed handle, an extra drawer, or a different base.
Use three review categories: Shape, Material, and Scale. Shape covers the silhouette and construction. Material covers visible finish and texture. Scale covers whether the scene suggests a size relationship that contradicts the product information.
A generated room is not a measurement. Keep actual dimensions available to shoppers, and reject scenes whose proportions visibly conflict with them. In your 2026 approval checklist, record the reason for rejection so the next revision addresses a defined problem rather than a vague preference.
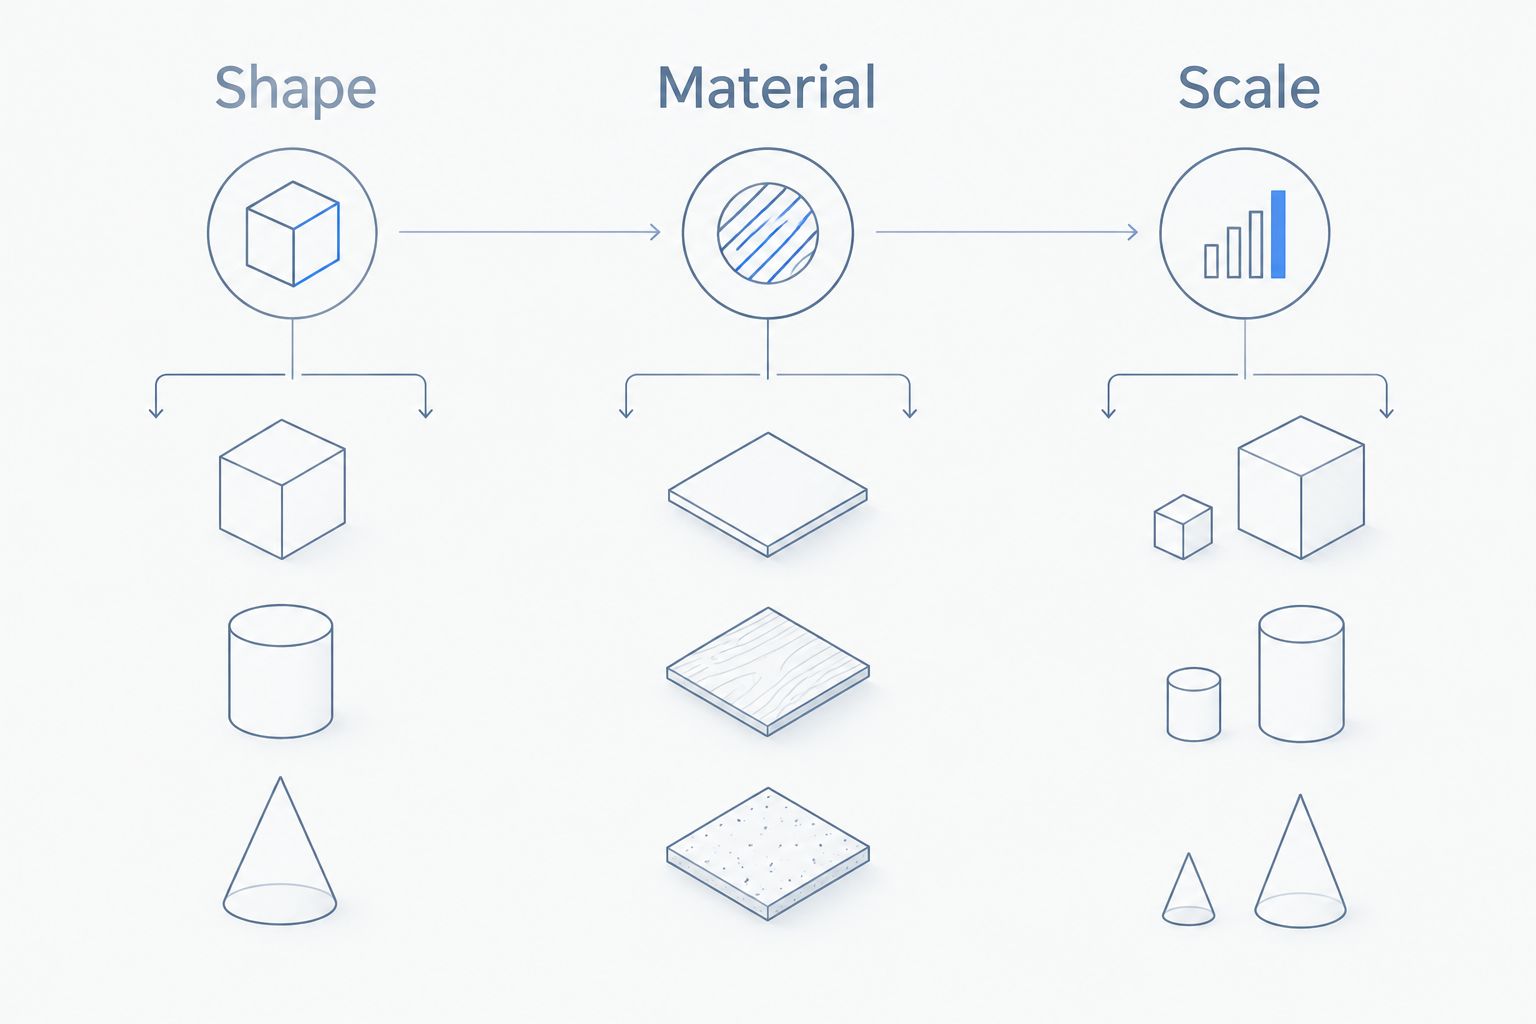
- Shape: compare silhouettes, openings, legs, handles, and joins.
- Material: compare grain, weave, reflectivity, and surface finish.
- Scale: check visible proportions against verified dimensions.
- Check reflections and shadows for inconsistent object details.
- Reject added features or accessories that change the offer.
6. Adapt approved concepts for photos and video
Finish the manual planning work first: choose the approved scene, write the message, and identify the required deliverables. If the campaign includes video, write a short shot description rather than assuming the still-image brief covers motion.
Icarus supports product photos and videos in the same suite. That makes it an option when both belong in your production plan; it does not establish that a particular scene, product detail, or motion will remain accurate. Review the actual output against the same references.
A video brief should say what moves and what stays fixed. For a decorative object, a change in viewpoint must not reveal a different opening or base. Review the sequence for product changes instead of approving only an attractive opening frame.
- Identify the approved product references for each deliverable.
- Write the video action separately from the still composition.
- Specify which product details must remain unchanged.
- Review visible construction throughout the video.
- Keep unapproved drafts out of publishing folders.
7. Publish by placement and track usable output
Create a simple asset register in a spreadsheet. Record the product variant, intended placement, approval status, and final filename. This gives a small team a practical way to avoid publishing an attractive draft that never passed product review.
Judge your workflow by finished work, not generated volume. Record how long review takes, why assets are rejected, and whether each approved asset satisfies its brief. These are measurements for your team to collect, not assumed benefits of any software.
For your next 2026 campaign, use the register to decide what needs replacing and what remains accurate. Keep production assessment separate from campaign performance: an approved image meets the brief, while sales reporting answers a different question about the campaign.
- Assign each asset to a specific product and variant.
- Record approval status and the person responsible.
- Track review time and rejection reasons.
- Confirm the published crop preserves important product details.
- Retire assets when the pictured product changes.
Compare production options for home decor
Choose the workflow that fits your deliverables and approval capacity. The table compares approaches, not tested quality scores. Check current commercial terms directly; the decision here is about production fit and limitations.
| Option | Best for | Main benefit | Key limitation |
|---|---|---|---|
| Icarus | Small teams needing product photos and videos | Both formats are available in one suite | Product fidelity still requires your review; combined capability does not establish output quality |
| Separate photo and video tools | Teams evaluating each format independently | You can choose a different tool for each task | Your team manages references and approvals across tools |
| Manual photography | Teams that need to photograph the physical item directly | You can inspect the actual product during capture | You must arrange the product, setting, lighting, and capture |
| Mixed workflow | Teams combining factual photographs with generated scenes | Physical references and creative scenes have distinct roles | You must maintain consistent product details across both |
Do not buy a combined suite merely because video is available. If your current brief requires only factual stills, evaluate that task first. If both formats are required, test the complete workflow before deciding whether separate applications are worth the additional coordination.
Common mistakes home decor brands make
Treating a room scene as proof of dimensions
A sofa beside a table creates a visual size cue, not verified measurement evidence. Keep product dimensions in your product information and check that the image does not contradict them. Do not ask shoppers to infer fit from generated surroundings alone.
Making the material more attractive than the product
A rough ceramic surface rendered as polished glaze changes what the shopper expects. The same problem applies to softened wood grain or altered fabric texture. Review finish accuracy before deciding whether the image looks appealing enough for an ad.
Styling with accessories that confuse the offer
A cushion, lampshade, or decorative insert can look like part of the item being sold. Make included components explicit in the brief. Remove confusing props or clarify the offer in the surrounding product content without relying on the image alone.
Generating a whole collection before approving one item
A repeated prompt does not prove every output is accurate. Approve a representative scene and a product-specific checklist before expanding the task. Then review each variant against its own references rather than treating the first approval as permission for the entire collection.
Choosing tools by attractive demonstrations alone
A demonstration using another product does not settle whether a tool suits your materials and construction. Use your own brief and references for evaluation. Separate a tool's confirmed capabilities from the quality and suitability of the outputs you actually review.
FAQ
What is AI product photography for home decor brands?
AI product photography for home decor brands uses generative tools to create product images and styled scenes. The brand still needs to verify that the pictured shape, finish, construction, and proportions match the item it sells.
Is Icarus a fit for a small home decor marketing team?
Icarus fits teams that want product photos and videos in one suite. Evaluate its outputs using your own product references and approval checklist rather than assuming the combined workflow guarantees accuracy.
Can I use generated room scenes on a product page?
Use a generated room scene only after checking that it accurately represents the product and does not confuse the offer. Keep verified dimensions and factual product views available so the scene is not the shopper's only evidence.
How do I keep furniture scale accurate in an AI image?
Check the scene against verified product dimensions and reject contradictory proportions. A generated room does not independently establish measurements, so it should not replace explicit size information.
Should I choose one suite or separate photo and video tools?
Choose one suite when having both formats together fits your production needs, and compare separate tools when you need to evaluate each task independently. Give both workflows the same brief and judge approved deliverables, review effort, and product accuracy.
What reference photos should I prepare for home decor products?
Prepare clear photographs of the exact variant, including the views and details needed to verify its construction and finish. Keep verified dimensions and material descriptions with those references.
Can AI product images replace every traditional product photograph?
Do not replace factual product evidence with generated images that you cannot verify. Keep direct photographs wherever they are needed to establish details that the generated output does not represent reliably.
One last thing
Approve the object before you approve the atmosphere. Remove the styled background from your mental review and inspect only the merchandise. Would you approve its silhouette, finish, and construction as an accurate representation of what the customer receives?
If the answer is no, another attractive room is not the next move. Fix the product representation or use a direct photograph for that placement. Your approval standard should stay the same whether the image comes from a combined suite, a separate tool, or a camera.