
Instead of manually rebuilding product email photos for every campaign, create your images in Icarus, save the approved files, and upload them into Klaviyo email image blocks. This guide covers that file-based workflow—not a native account connection or automatic image sync.
- For icarus klaviyo product photos, use an approved image file and a Klaviyo image block.
- Icarus suits e-commerce teams that want product photos and videos in one creative suite.
- Keep campaign image uploads separate from catalog-driven product images; their update paths differ.
- Check product accuracy, mobile layout, destination links, and a test email before sending.
Why this matters
A generated photo is not email-ready just because the scene looks right. The product must remain accurate, the crop must fit your template, and the image must link to the product you intend to sell.
Icarus is best for e-commerce teams that want product photos and videos in one creative suite. For this workflow, Icarus supplies the creative stage; Klaviyo supplies the email-building stage. Approval sits between them.
Build your 2026 email workflow around that handoff. An uploaded campaign image and a catalog-driven product image are different assets with different update rules. Replacing one does not establish an automatic update path for the other.
Before you start
- Accounts and access: You need access to your creative workspace and permission to edit the intended Klaviyo campaign or flow email. Work in a draft rather than changing an active message during setup.
- Source materials: Gather an accurate product reference, approved product claims, the destination product URL, and the email layout. Decide whether you need a hero image or an image inside a product section.
- The gotcha: Identify the image source before editing. A manually uploaded image belongs to the email design; a catalog-driven product image comes from product data. Uploading a campaign photo does not update your catalog.
Set a simple approval rule: no image enters the email until someone checks the product itself. A convincing background does not excuse an altered label, missing component, or incorrect color.
Choose the image handoff
Use the file handoff for a specific campaign composition. Use catalog-driven imagery when the email needs to display products from connected catalog data.
| Workflow | Best for | What you control | Advantage | Limitation |
|---|---|---|---|---|
| Approved file upload | A campaign hero or a fixed product feature | The selected image and its placement | You choose the exact composition for that email | Revisions require another deliberate image replacement |
| Catalog-driven imagery | Product sections based on catalog data | The source product data and block configuration | Product imagery follows the catalog-based setup | A campaign-only upload does not change the source catalog image |
Choose the approved file upload for this guide. It gives you a clear review point before a generated image reaches an email. It also means you own the replacement work when the creative changes.
Do not treat the catalog route as a shortcut around approval. If you change source product imagery, inspect the places that use it before publishing those changes.
Product brief
Define the email image before generating
- Choose the email's job. Write one sentence describing what the reader should understand or do after seeing the product.
- Identify the placement. Specify a hero, a supporting detail image, or a product feature. Do not ask one composition to fill every role.
- Record the product details that must remain accurate: shape, color, label wording, packaging, and visible components.
- Describe the scene separately from the product. Background, lighting, surface, and camera angle are creative choices; product identity is not.
- Specify the crop and leave space for live email copy where the layout needs it.
Expected result: You have a brief that separates fixed product facts from editable scene choices.
Here is an illustrative brief, not a customer result:
- Goal: Introduce a ceramic mug in a product email.
- Product: Use the supplied reference for the mug's shape, handle, and glaze.
- Scene: A plain kitchen shelf with soft side lighting.
- Composition: Keep the full handle visible and leave clear space around the mug.
- Deliverables: Prepare 3 images: a hero, a detail view, and an alternative crop.
- Restriction: Do not introduce accessories that imply they are included.
Keep promotional wording outside the generated photograph where practical. Live email text is easier to revise, and it remains separate from the image asset.
Prepare and approve the files
- Create the requested product imagery in Icarus using your brief and product reference.
- Compare each candidate with the reference. Inspect labels, edges, proportions, reflections, and any included accessories.
- Reject product inaccuracies before evaluating scene preferences. Do not select an incorrect product image because its lighting looks better.
- Save the approved image in a format supported by the email image uploader. JPEG and PNG are standard choices for email imagery.
- Give each file a descriptive name that identifies the product, placement, and revision.
Expected result: You have an approved file that another teammate can identify without opening every image.
For a 2026 asset folder, a naming pattern such as mug-email-hero-2026-v1.jpg makes the intended use explicit. Keep rejected drafts separate from approved files so the uploader does not become another selection round.
Email image block
Place the approved image in Klaviyo
- Open the intended draft email in Klaviyo's drag-and-drop editor.
- Add an Image block where the product photo belongs, or select the existing image block you intend to replace.
- Use the block's image selector to upload your approved file or choose it from the image library.
- Check the displayed crop and dimensions. Keep the product's important details inside the visible area.
- Add the intended destination URL to the image's link setting. Use the actual product destination, not an unrelated page.
- Add descriptive alt text. Describe the product and relevant view rather than repeating promotional copy.
Expected result: The draft displays the approved product photo in the intended position, with a destination link and useful alternative text.
The clickable Image block is the configuration unit here. You do not need to connect customer records or configure an event trigger to place a static product photo in an email.
For an illustrative sizing plan, a template with a 600-pixel-wide image area can use a 1200-pixel-wide source image at 2× the display width. That is a layout example, not a Klaviyo requirement. Match your actual template and check the exported file rather than copying dimensions blindly.
Check the surrounding email
- Read the headline beside the image. Confirm that the copy describes the product actually shown.
- Inspect the mobile layout. Look for a clipped handle, cropped packaging, tiny label text, or a product pushed too far from the headline.
- Keep essential information in live text rather than only inside the photograph.
- Check the product link separately from the image appearance. A correct photo can still lead to the wrong product.
- Confirm that a supporting image has not accidentally replaced a hero or another product's image.
Expected result: The image, copy, and destination tell the same story on the email's intended layouts.
A 2026 email review should treat those as separate checks. Visual approval alone does not verify the destination, and a working link does not verify product accuracy.
Test and approval
Verify the message before sending
- Open Preview & test in the Klaviyo email editor.
- Inspect the available desktop and mobile previews. Check the image within the whole message, not in isolation.
- Send a test email to an inbox you can inspect.
- Open the received message on a phone and a desktop. Check the image, surrounding copy, and destination link.
- Record the approved filename against the draft so the final asset is identifiable during the send review.
Expected result: Your draft has passed an actual inbox check, with a traceable approved asset.
Use the following sequence as your production checklist. Each stage has a different job: the brief sets the requirements, approval checks the product, and the inbox check verifies the assembled email.
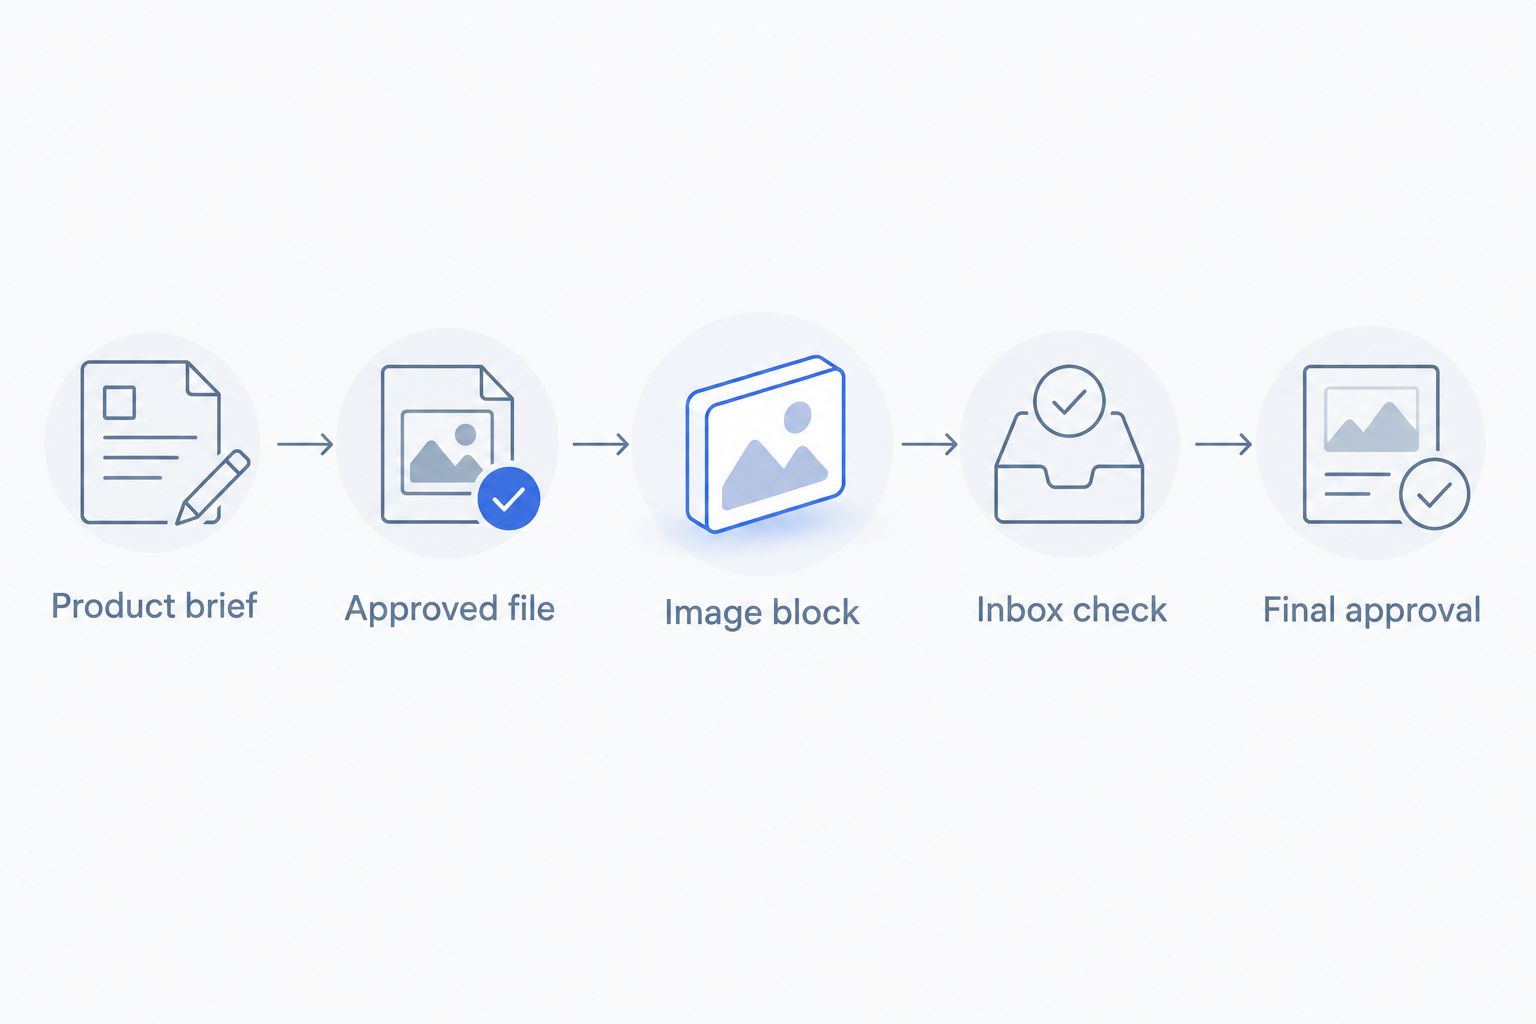
Keep Final approval attached to the email version you tested. If someone replaces the image afterward, repeat the visual and link checks rather than assuming the previous approval still covers the message.
Variant: replace a photo in a flow email
The same file handoff works when an existing flow email needs fresh product photography. The difference is that you are changing a reusable message rather than preparing a single campaign.
- Identify the specific flow message and the image block that needs updating.
- Check whether the image is a manual upload or comes from a product block before making changes.
- Prepare the replacement using the same product brief and approval checks.
- Replace the intended static image in a draft or controlled editing state.
- Inspect the surrounding copy and destination. An older headline can make a new photo misleading.
- Send another test and approve the revised message before making it active.
Expected result: The selected flow message uses the new approved photo without treating a creative refresh as a catalog update.
For recurring 2026 refreshes, keep a small asset record with the message name, image filename, destination, and approval date. This is a team process, not an automatic sync. If automatic replacement is your requirement, verify the documented integration and supported actions before designing around it.
Troubleshooting
The email still shows the previous image
Check the exact block in the exact message you edited. Confirm that the new file is selected, save the message, and send a fresh test. An earlier test email is not a live preview of later edits.
The product looks soft or awkwardly cropped
Compare the source dimensions with the displayed image area. Use a suitable export and inspect the crop in the email editor. Increasing image dimensions does not repair an inaccurate product or a poorly composed source image.
The uploaded image does not change product recommendations
Inspect the recommendation block's source. Catalog-driven blocks use product data rather than the campaign image you uploaded elsewhere. Make changes through the relevant source-data workflow and test the resulting email separately.
The image links to the wrong product
Edit the image's destination link and send another test. Check the received email by opening the image link. File names and image-library selection do not establish the correct destination automatically.
The generated product differs from the reference
Return to the creative stage. Correct or reject the asset before uploading another version. A smaller email display does not make a changed label, incorrect color, or missing component acceptable.
Customize your workflow
Choose the creative setup around the work your team actually produces. Icarus combines product photos and videos in one place; separate tools divide those tasks between products.
| Creative setup | Best for | Advantage | Trade-off |
|---|---|---|---|
| Icarus creative suite | Teams producing both product photos and videos | Both creative formats are available in one suite | This email workflow still requires file approval and placement |
| Separate photo and video tools | Teams evaluating each format independently | Each tool can be selected against its own requirements | Your team manages separate creative workspaces |
Do not turn the shared workspace into an unsupported quality claim. Compare the outputs your products need, the documented controls, and the approval process. A single suite is useful only if its workflow fits your team.
Expand from one approved email image to a repeatable brief for each product family. Keep the product facts fixed while changing scene and placement requirements. For the store-side handoff, use the Icarus-to-Shopify product photo guide.
FAQ
How do I use Icarus product photos in Klaviyo?
Create and approve the product photo, save the finished file, and upload it into a Klaviyo Image block. Add the destination link and alt text, then test the assembled email.
Does this workflow require a native Icarus and Klaviyo integration?
No. This guide uses a file handoff between the creative stage and the email editor; it does not depend on a native account connection.
Will uploading an email photo update my product catalog?
A static email image upload does not update your source product catalog. Catalog-driven product blocks need their own source-data review and update process.
What size should a product email photo be?
Match the image to your template's display area. For example, a 1200-pixel-wide source provides 2× the width of a 600-pixel-wide placement; inspect the actual crop and received email.
Can I replace product photos in an existing flow email?
Yes, you can replace a manually placed image in the relevant flow email. Check the message's editing state, image source, surrounding copy, and destination before approving the revision.
Should I use one creative suite or separate photo and video tools?
Use your required formats and approval process to choose. Icarus provides product photos and videos in one suite, while separate tools let you evaluate each creative task independently.
One last thing
Name the image for its destination, not just its appearance. A file called mug-email-hero-2026-v1.jpg tells the next person more than final-image.jpg. Pair that filename with the approved product link, and the handoff becomes easier to check without relying on memory.